To start developing an application, first create a new project. To create a new project:
- Choose File > New Project or press Ctrl+Shift+N
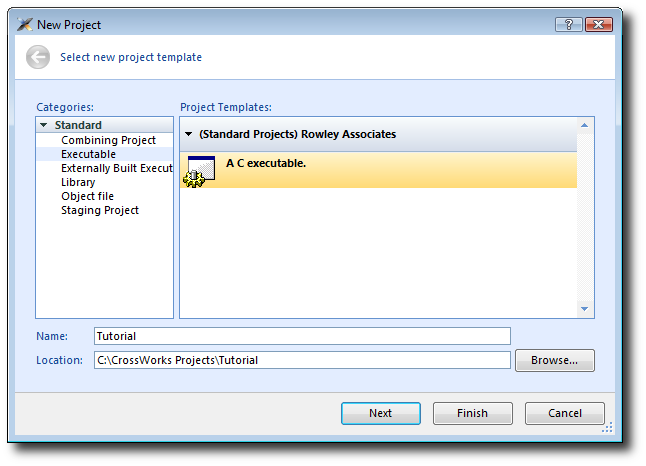
The New Project dialog appears. This dialog displays the set of project types (Categories) and project templates.
 )
)
We'll create a project to develop our application in C:
- In the Categories pane, select the Standard > Executable
- From the list in the Project Templates pane, select the A C executable
- In the Name text field, type Tutorial to assign that as the new project's name.
- You can use the Location text field or the Browse button to locate where you want to save the project in your local file system.
- Click Next.
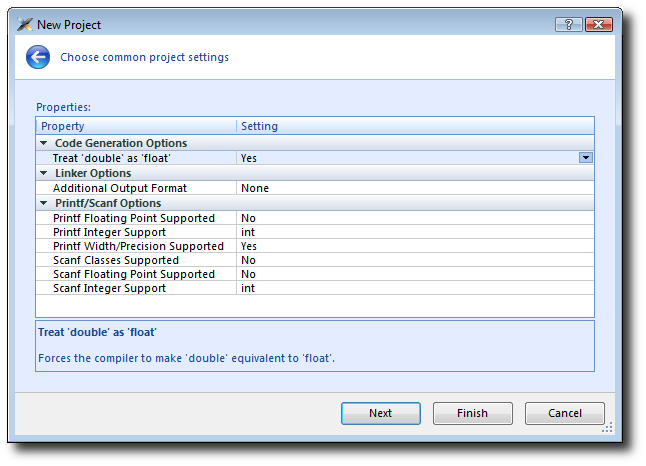
Here you can customize the project by altering a number of common project properties, such as an additional file format to be output when the application is linked and what library support to include if you use printf and scanf. After the project is created, you can change these settings in the Project Explorer as needed.
- You can double-click a project property or its value to display either a drop-down menu of potential, valid values or a text field in which you can type arbitrary values. For our tutorial, the default values are fine.
- Click Next to display a list of the files CrossStudio will add to this project be default. You can uncheck any file you plan to add manually or that you know will not be needed.
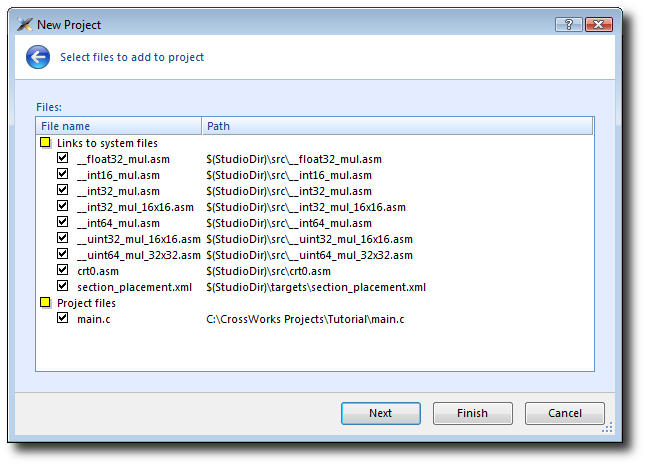
The Links to system files group shows the links to CrossStudio system files that will be created in the project. Because these files are links, the default behavior is that they will be shared with other projects—so modifying one will affect all projects containing similar links. To prevent accidental modification, these files are created as read-only. Should you wish to modify a shared file without affecting other projects, first import it into the project. (Importing a shared file will be demonstrated later in this tutorial.) See Creating and managing projects for more information on project links.
The Project files pane shows the files that will be copied into the project. Because these files are copied to the project directory, they can be modified without affecting any other project.
If you uncheck an item, that file is not linked to, or created in, the project. We will leave all items checked for the moment.
- Click Next to view the default configurations that will be added to the project. Again, you can uncheck any you know will not be needed but, for this tutorial, we will leave the defaults unchanged.
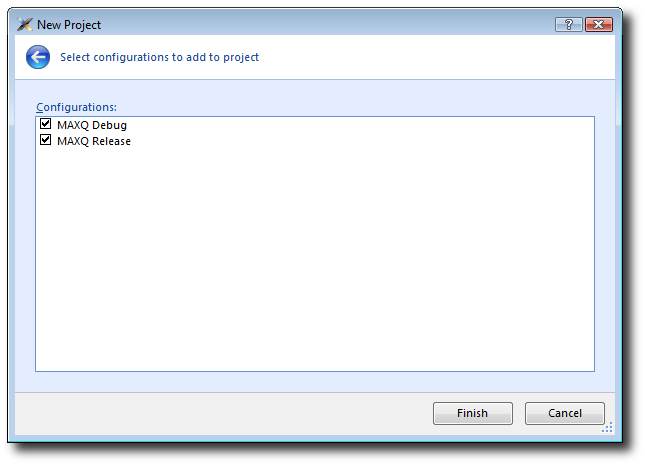
Here you can specify the default configurations that will be added to the project. See Creating and managing projects for more information on project configurations.
- Click Finish to complete the new project's creation.
The Project Explorer shows the overall structure of your project. To invoke it, do one of the following:
- Choose View > Project Explorer.
—or—
- Type Ctrl+Alt+P.
This is what our project looks like in the Project Explorer:

The project name is shown in bold to indicate it is the active project (and, in our case, the only project). If you have more than one project, you can set the active project by using the drop-down box on the Build tool bar or by right-clicking the desired project's name in the Project Explorer to display the shortcut menu with the Set as Active Project command.
The files are arranged into two groups; click the + symbol next to the project name to reveal them:
- Source Files contains the main source files for your application, typically header files, C files, and assembly code files. You may want to add files with other extensions or documentation files in HTML format, for instance.
-
System Files contains links to source files that are not part of
the project but are required when the project is built and run. In this case, the system files are:
crt0.asm — the C run-time startup, written in assembly code
the source code for the hardware multiply routines
section_placement.xml — tells the linker how to arrange program sections in memory
Files stored outside the project's home directory (with a small purple shortcut indicator at the bottom left of the icon, as above.
These folders have nothing to do with directories on disk, they are simply a means to group related files in the Project Explorer. You can create new folders and specify filters for them based on the project files' extensions; thereafter, when you add a new file to the project, it will be shown in the Project Explorer folder whose filter matches the new file's extension.