We'll now set up the example project with some files that demonstrate features of the CrossWorks IDE. For this, we will add one pre-prepared file and one new file to the project.
Adding an existing file to a project
To add one of the existing tutorial files to the project:
- Choose Project > Add Existing File or press Ctrl+P, A.
—or—
- In the Project Explorer, right-click the Tutorial project node.
- Choose Add Existing File from the shortcut menu.
In response, CrossWorks displays a standard file-locator dialog. Use it to navigate to the CrossWorks installation directory, then to the tutorial folder, where you should select the fact.c file.
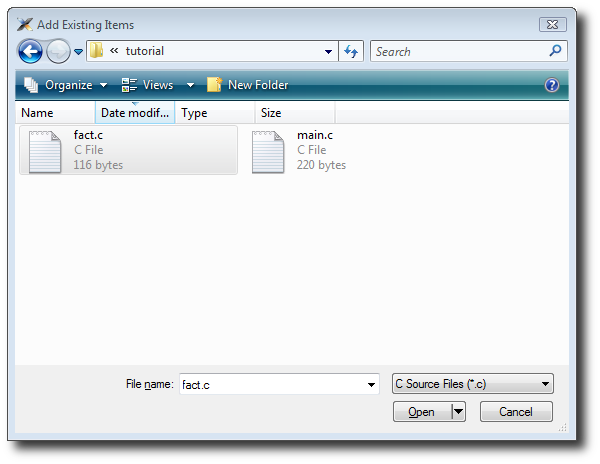
Click Open to add the file to the project. The Project Explorer will list fact.c in the Project Items' Source Files folder, with a shortcut arrow because the file is not in the project's home directory. Rather than edit the file in the tutorial directory, we'll put a copy of it into the project's home directory:
- In the Project Explorer, right-click the fact.c node.
- From the pop-up menu, click Import.
The shortcut arrow disappears from the fact.c node, indicating that our working version of that file is now in our Tutorial project's home directory.
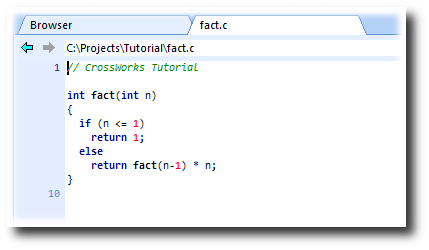
We can open a file for editing by double-clicking the node in the Project Explorer. For example, double-clicking fact.c opens it in the code editor:
Adding a new file to a project
Our project isn't complete, because fact.c is only part of an application. To our project we'll add a new C file that will contain the main() function. To add a new file to the project, do the following:
- Choose File > New to open the New File dialog.
—or—
- On the Project Explorer tool bar, click the Add New File button.
—or—
- In the Project Explorer, right-click the Tutorial node.
- Choose Add New File from the shortcut menu.
—or—
- Type Ctrl+N.
The New File dialog appears.
- In the Categories pane, select C C++ to indicate the general type of file.
- In the Templates pane, select the C File (.c) option to further specify the kind of file we will be adding.
- In the Name edit box, type main.
The dialog box will now look like this:

Click OK to add the new file.
CrossWorks opens the new file in the code editor. Rather than type the program from scratch, we'll add it from a file stored on disk. With the new, empty main.c in the foreground:
- Choose Edit > Others > Insert File or press Ctrl+K, Ctrl+I.
- Using the file-selection dialog, navigate to the tutorial directory.
- Select the main.c file.
- Click OK.
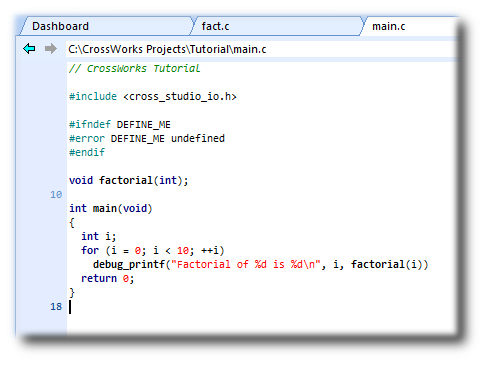
Your main.c file should now look like this:
Next, we'll set up some project options.